
How does a travel eSIM work?
Six steps from choosing a plan to being online abroad. No store visit, no SIM swapping, no ID registration.

The full flow
Pick a destination & plan
On each destination page, narrow down with five filters — plan type, days, data, local network and brand. Every plan states exactly which local network it uses.
Choose eSIM or physical SIM
eSIMs activate right after payment with no shipping wait; physical SIMs are mailed free within Hong Kong. Pick physical if your phone lacks eSIM support or you're buying for someone else.
Pay
Hong Kong / mainland China customers check out via KPay (FPS, PayMe, Alipay, WeChat Pay, Visa/Mastercard); everyone else is routed to Stripe, which takes all major credit cards. All prices are in HKD.
Receive your QR code
After payment the system provisions your SIM with the supplier, normally within 30 seconds. The QR code appears on your order page and is emailed to you. Keep that order link.
Install before you fly
Scan the QR code on Wi-Fi to add the eSIM. Installing doesn't start the clock — validity begins the day you first connect to the local network.
Land and enable roaming
After arriving, select the eSIM in Settings and switch on Data Roaming — it finds the local network automatically and you're online.
iPhone installation
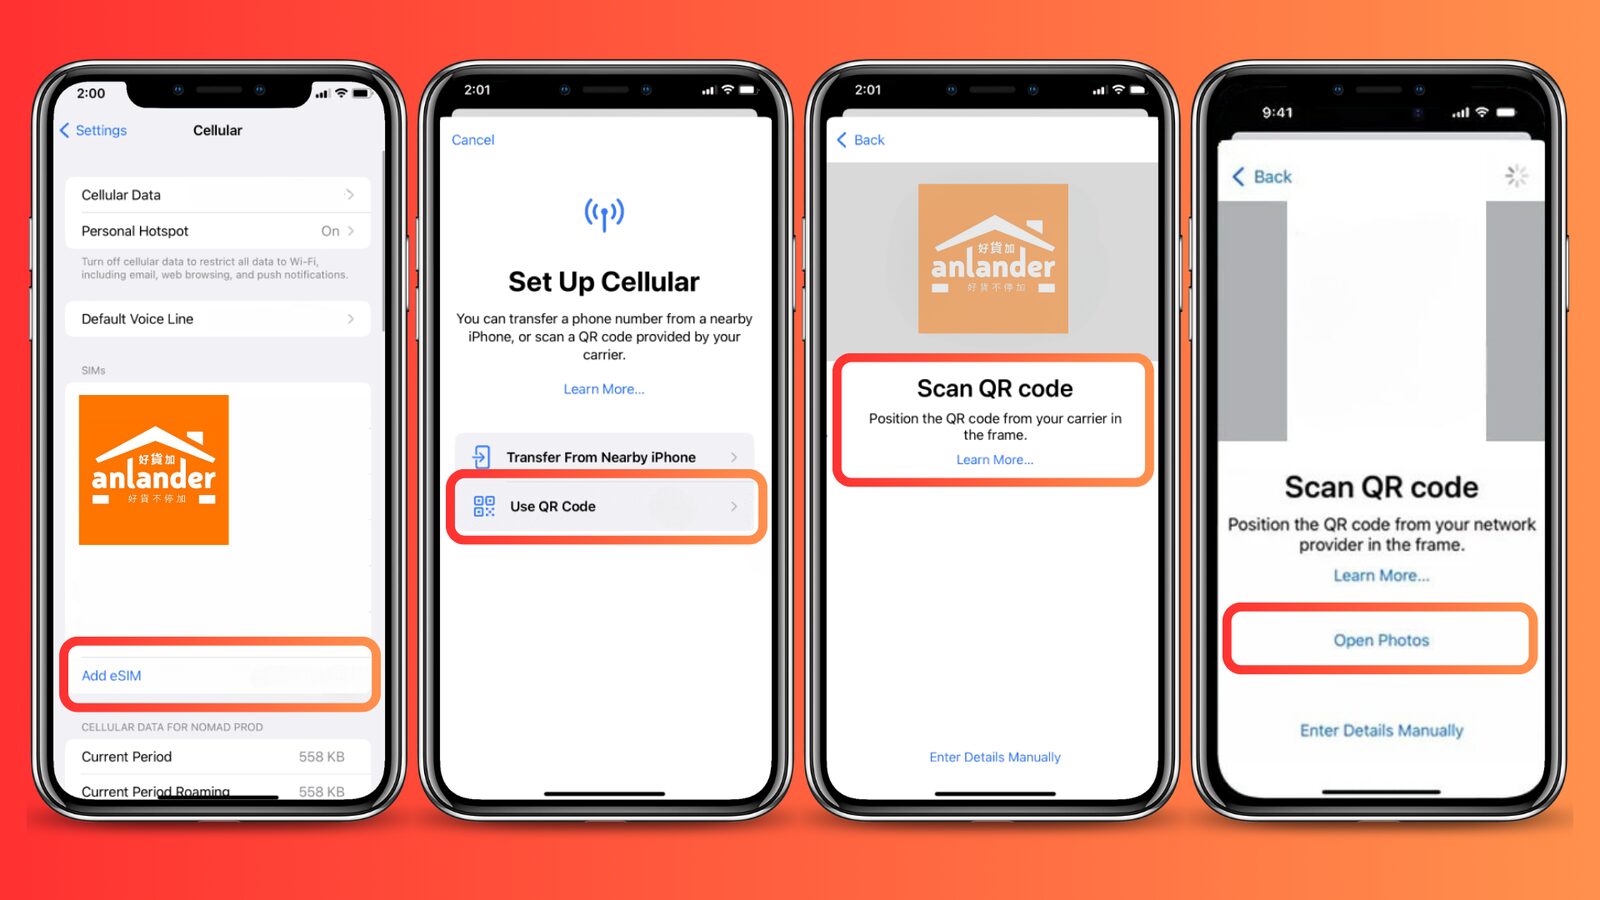
- Settings → Mobile Data (or “Cellular”)
- Tap “Add eSIM” → “Use QR Code”
- Scan the QR code from your order page or email
- Rename the label (e.g. “Japan”) so it's easy to find
- Keep “Default line” on your own number; set “Mobile Data” to the new eSIM
- After landing: Settings → Mobile Data → select the eSIM → enable Data Roaming
Android installation
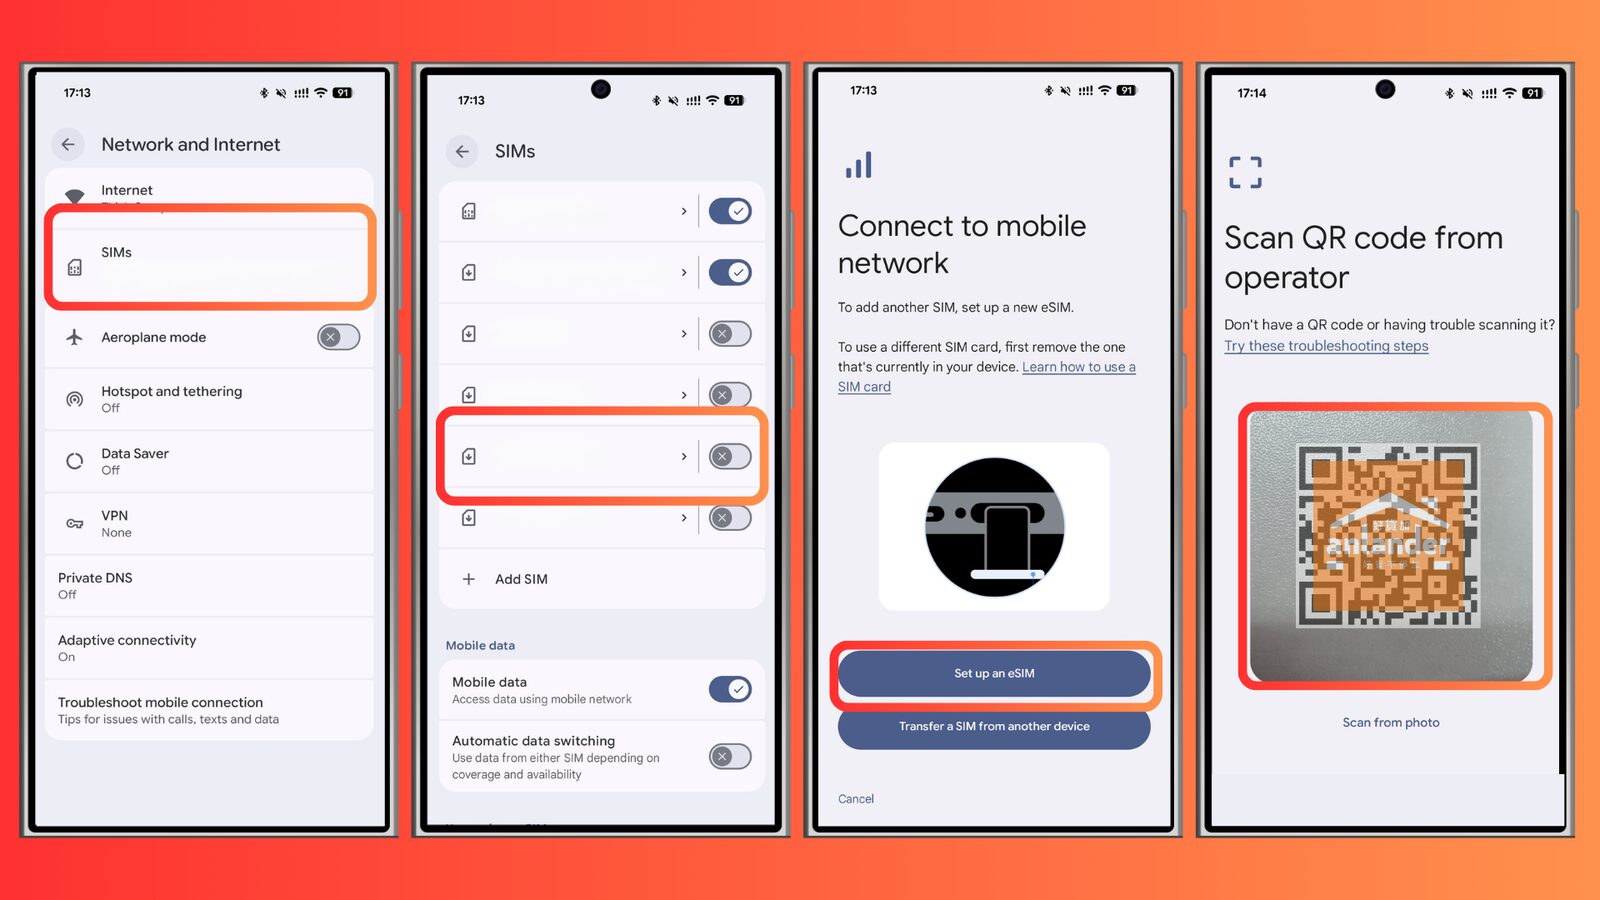
Menus vary by maker, but the flow is the same:
- Settings → Network & Internet → SIMs (Samsung: Connections → SIM Manager)
- Tap “Add eSIM” / “Download SIM”
- Scan the QR code and let the profile download
- In SIM Manager, point “Mobile data” to the new SIM
- After landing, enable Data Roaming for that SIM
Common installation issues
Can't scan the QR code
Misaligned camera or screen glare are the usual culprits. Display the QR code on another device (computer, tablet) and scan that, or use “Enter details manually” with the activation code printed under the QR.
“Unable to add mobile plan”
Usually one of three causes: ① the phone doesn't support eSIM; ② the phone is carrier-locked; ③ the QR code was already used once. Check the compatible devices page first, then contact us if it persists.
Installed but no internet
Nine out of ten times Data Roaming is off. Settings → Mobile Data → select the eSIM → enable Data Roaming, then restart. Failing that, manually pick the carrier named on your plan under network selection.
Receiving a physical SIM
After payment we mail within Hong Kong, free; allow at least 3–5 working days. Ordinary post has no tracking number — choose courier or eSIM if you're short on time. Insert it before you fly; it works when you power on after landing.